Doom Sprite Workflow for Photoshop
Posted in Anno Domini Thu Sep 19 2024
I've done a little bit of Doom modding in my time, and that's involved a bit of adding new sprites of wildly varying quality to the game. This is my workflow for Photoshop. It may or may not be weird overcomplicated bullshit, but it's my kind of weird overcomplicated bullshit.
I wrote this up in 2017, and I had to hit up the Wayback Machine recently because the link I used for the script that's center to all this was down due to Twitter Stuff. So I'm throwing this here to ensure it doesn't run away again. It might be useful for people making 2D games for other engines, but honestly, they're probably using Aesprite or MSPaint or something like all the other cool kids.
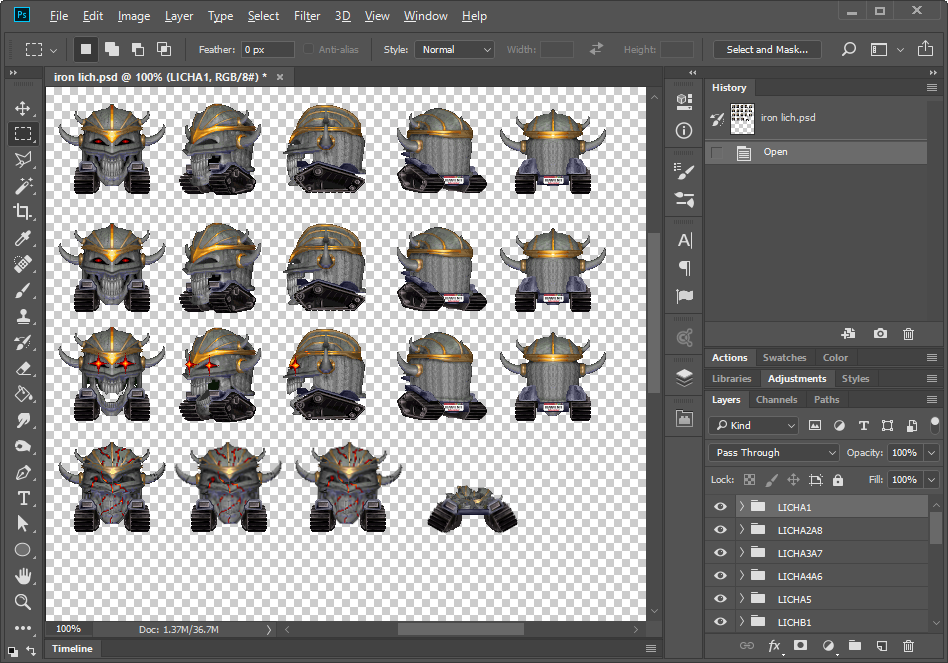
Here's one of my source files from JPF, from when I was "upgrading" Heretic's Iron Lich with tank treads because I was very upset at a floating head not actually being able to float and wanted to visually justify it. The first thing you'll notice is that every frame has its own folder in the layers area. Back when I was making these mods I had to make a folder for every sprite manually, but as of today there's now a nice script by Jdaiv on GitHub that automates this! What a swell guy. So with that in mind, here's how to start things off:
- Save that script to the Presets\Scripts subdirectory of your Photoshop install. Give it a nice name and a .jsx extension. I don't know if that last part is completely necessary, but I did it anyway. I dubbed it "Create Folders from Layers.jsx".
- Open Photoshop (restart if it's already open) and create a new document. Make it reasonably big and 72dpi, with a transparent background if you can help it (if not, just delete the background layer or something).
- Drag and drop the sprite set you want to edit onto the document, then hold down Enter for a little while to confirm placement of all of them as Smart Objects or whatever.
- Drag and sort them around the document as you wish. This bit's up to you, frankly. I don't know how OCD you are. Personally, I like to highlight them all and go Layer > Arrange > Reverse so that all the A rotations are at the top of the list etc.
- Highlight all the layers, right click them and select "Rasterize Layer".
- With the layers still all highlighted, Click File > Scripts > The Name Of The Script We Saved Earlier.
You'll now have a big bunch of folders, each containing a single layer, each named after the layer inside of it. This will be helpful later!
Right, next step. Let's look inside one of my folders.
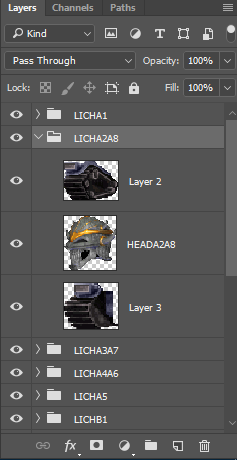
You'll notice that I use layers. I use layers a lot. I use them so much. Using this method, you can cheerfully use all the usual Photoshop tools like brushes, adjustment layers etc. on your sprites.
Once your sprites are done, minimise all your folders (so you can't see the contents in the layer viewer), select them all, and Right Click > Export As.
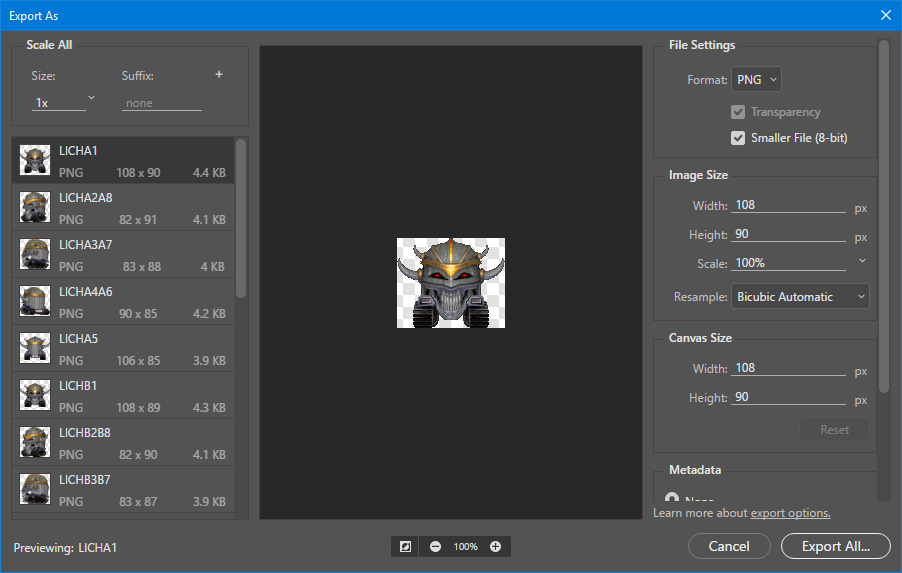
You'll notice that all your layers have each been merged down into a single, lovely graphic that has all your changes. Select them all and set them to PNG, 8-bit, then click Export All and select a convenient folder. Congrats! Now you have all your sprites with the proper naming conventions all edited up and ready to be imported into SLADE! Granted, they don't have offsets, but that's fairly easy to fix.
BUT!
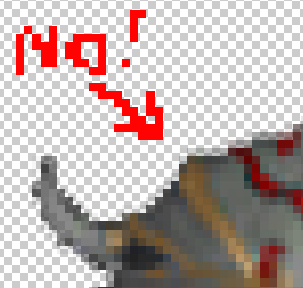
Depending on what tools you used or how you did things (like resizing or rotating), some of these sprites may have anti-aliasing around the edges, may be 16 million colour instead of paletted (not that GZDoom cares much) or other things that effect the beautiful crispness and purity of your work. This cannot be allowed. (Or it can. Either/or.) Either way, if you want to fix this, it's quite easy. Just open that sprite and use Image > Mode > Indexed Color to crush that bad boy down to 256 colours. This will also remove such aliasing.
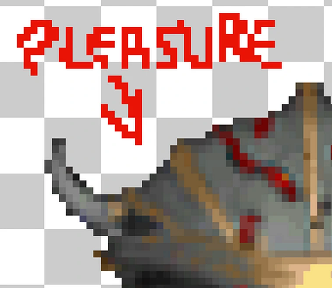
I personally set "Matte" and "Dither" to "None" when doing this. I also don't force a palette unless I need to (ie. for player palette translation) since I target hardware renderers that don't much care about sticking to one palette. If you do care, it shouldn't be too hard to export a sprite from Doom 2 etc. from SLADE, load it into Photoshop and save its palette for future use.
It may take a while to manually apply this to a lot of sprites (like say every frame of a monster), though, so here's what I like to do after completing all of the previous steps and exporting my sprites:
- Open the Actions panel (Window > Actions)
- Create a new Action with a sensible name. You'll notice the record button lighting up.
- Without doing anything else, use Indexed Color as stated above.
- Hit the stop button.
Now we have an Action of you hitting the Indexed Color command. So what? So now we can batch-apply the command to all your sprites.
- Close your source document. Make sure it's saved nicely in a memorable place!
- Open all your exported sprites. Just drag and drop 'em into your empty Photoshop window. It'll probably take a minute or so to load them all.
- Click File > Automate > Batch and this window will pop up.
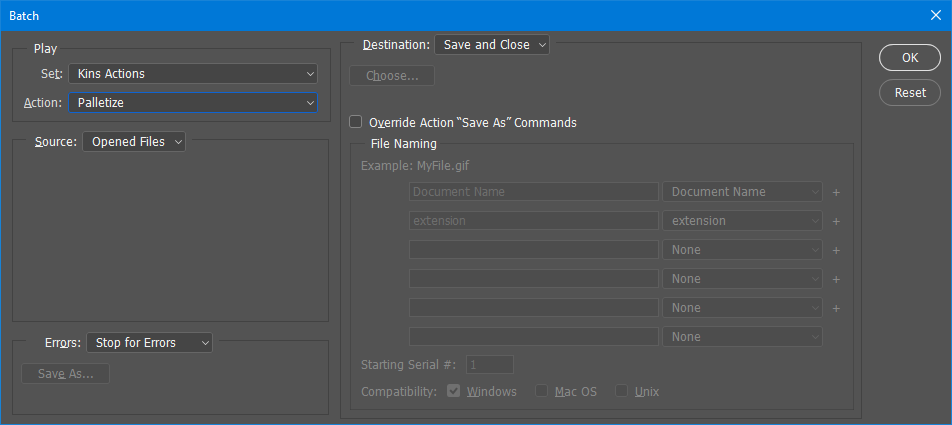
Photoshop will now individually index-ify, save and close all those sprites you opened up, so you should probably go get a drink at this point because it might take a couple of minutes depending on your machine.
And that's it! Hopefully someone finds this useful, or at least doesn't consider me completely crazy for doing things like this. There are almost certainly ways to improve upon this, and I'd love to hear them!
| Archives | Previous Post | To the Top | Next Post | Get in Touch |